‘Oh My Darling’ Florentine Biscuits
by Chryssie

It wouldn’t be a blog-visit to Florence without a whole batch of Florentines being baked. In this case, it was actually two batches, as I forgot to write down the recipe the first time and promptly forgot once I had sunk my teeth into a few biscuits.
As luck or divine intervention would have it, the second batch turned out even more delicious and my completely justified decision to buy a brand new notebook with pastel stripes meant that the recipe was definitely written down for keeps.
The name of this particular batch, comes from the fact that I couldn’t decide how the word was pronounced. I realised it was floren-TEEN not floren-TYNE, and my confusion must have come from the visual rhyme of the word clementine. This then led to me singing “Oh My Darling, Florentine” (with the correct pronunciation of course) as I baked away.
I really enjoy Florentines, as not only are they sneakily coated in chocolate, but they look very pretty. If held up to the light, it’s like a stain glass window with a lattice of biscuit and windows of glace cherry. You can understand how these are traditionally made at Christimas, but personally, I think they’re too good to not bake all year round.
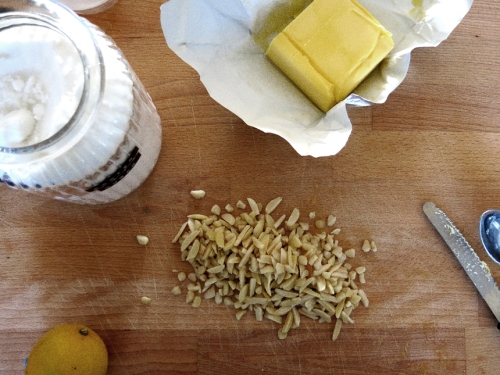


In making this recipe, I decided to keep things simple and omit all those fancy additions like mixed peel. I decided to make the Florentines that I would like to eat, with all my favourite things. On the nutty side, I went for macadamias and almonds, which are a perfect partnership in texture and taste, while on a fruity note I decided on dried figs and dates – two of my all time favourites (and the definite winners of the dried fruit world).
To cut through the sweetness, some freshly grated lemon peel brings a ZING that is undoubtedly necessary in this recipe and takes these treats to a whole other level.
In selecting your chocolate, feel free to go with your personal tastes – traditionally these are half-coated in dark chocolate, but I was really craving the slightly sweeter pairing of milk chocolate.
Once baked, cooled, coated in chocolate and cooled again, munch away to your heart’s content, and sit back and dream of sunsets over Italian bridges.
Florentine Biscuits (makes 14)
50g honey
50g butter
50g sugar
one teaspoon vanilla bean paste (or extract)
50g mixed nuts, skinned
six dried figs
seven dried dates
eight glace cherries
half a teaspoon of lemon zest
four tablespoons of plain flour
150g of chocolate, broken into smaller pieces
Preheat your oven to 180 degrees celcius and line some trays with baking paper.
Chop nuts and dried fruit, but don’t worry about being too uniform about the size – a bigger chunk here or there adds a nice texture. Combine these in a bowl and set aside.
In a small saucepan, melt together the honey, butter and sugar, swirling every so often to combine, until the sugar is melted and the mixture is just starting to bubble. Take off the heat, and stir in vanilla bean paste.
Pour butter mixture over the fruits and nuts, add flour and lemon zest and stir with a metal spoon to combine. Your mixture will be sticky, but this will result in a lovely, chewy biscuit.
Take a teaspoon of the mixture in your hand, roll into a ball and flatten on the tray with your palm. Repeat with remainder of the mixture, making sure you allow enough room between the dough for the biscuits to spread while cooking. If the dough is too sticky, flour your hands slightly.
Cook one tray at a time, for 7 – 10 minutes, until the edges are a nice golden colour.
Leave to cool.
Melt the chocolate in a bain-marie, in a bowl over a simmering pot of water, making sure the bottom of the bowl does not touch the water itself. Take the bowl off the heat (being careful as it may be hot) when the chocolate has almost completely melted and stir to completely melt by residual heat.
Take a cooled biscuit in one hand and a teaspoon with the melted chocolate in the other. Dollop the melted chocolate in the middle of the flat side of the cookie, and spread to the edges from the centre using the back of the spoon.
Place chocolate side up on a cooling rack to allow chocolate to harden. After 10 or so minutes, when the chocolate is just starting to set, wiggle a fork through to create the customary squiggles.
Who said you can’t play with your food?

These look divine! Can’t wait to try them soon x
http://www.mixandfold.blogspot.com.au
Oh thank you, so lovely of you to say so!